

Survey Passwords
When you’ll see participants in person, or if you only have mailing addresses, you can create Survey Passwords for offline distribution. You will be able to create a custom login page with a custom URL, along with Single- or Multi-use passwords. These passwords may be generated randomly, or uploaded from a List or File.
Navigate to
Single-use Passwords
Choose Single-use Passwords if your survey will be distributed to participants who should only be allowed to participate once. You may also use pre-population to pre-fill known data.
Multi-use Passwords
When you will provide a group of participants with a password offline, possibly through a flyer or poster, and you want to allow multiple responses through a single password, choose Multi-use Passwords.
Here’s how to create passwords:
- Select your project, then click on the Publish icon.
- Choose Survey Passwords under Offline.

- Under Select Password type, choose your preferred password type.
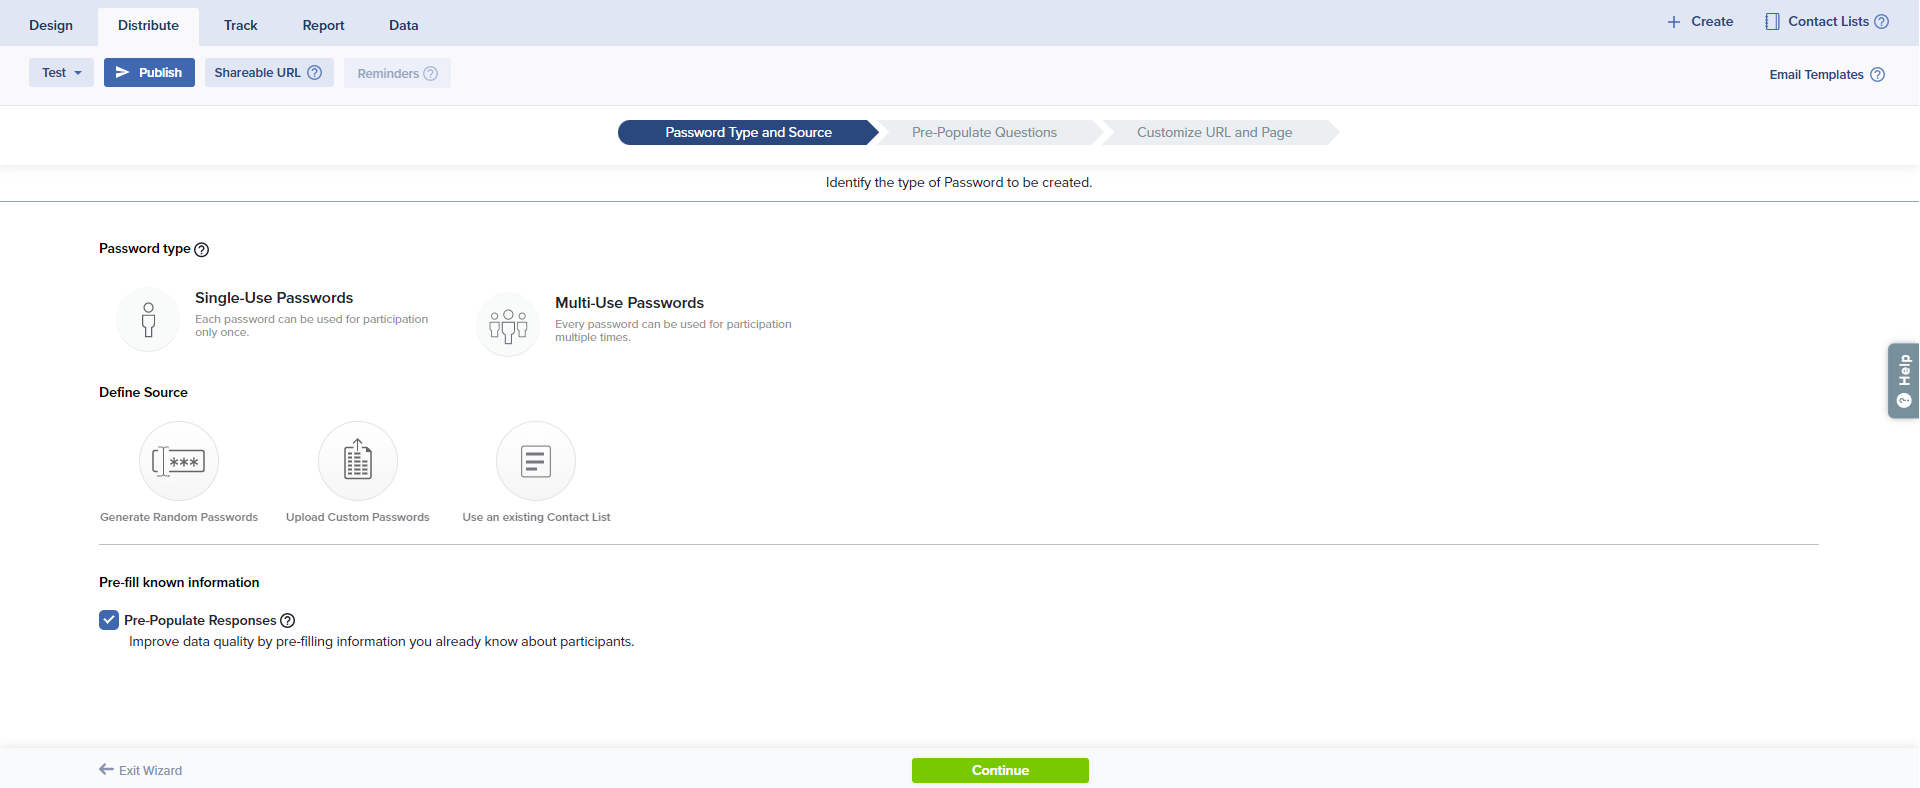
- Single-Use Passwords: These passwords will allow only one response each.
- Multi-Use Passwords: These passwords will each allow multiple responses.
- Select the Source of Passwords based on your preferred method, then follow the steps below.
- Random Passwords
For quick system-generated passwords, select Generate Random Passwords.
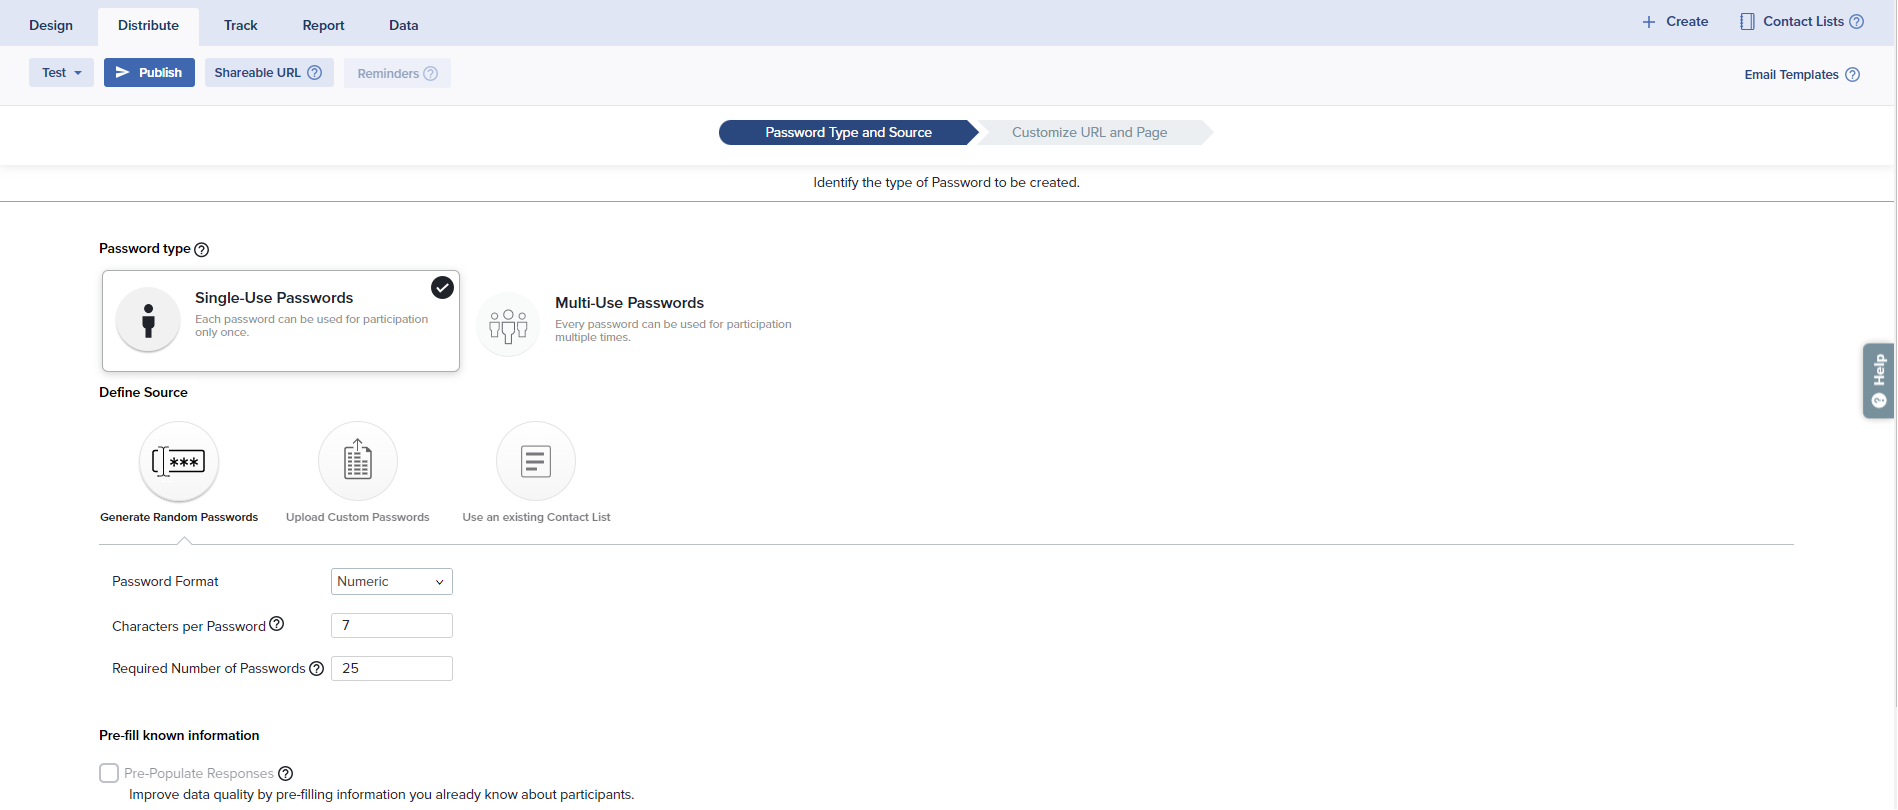
- Enter the number of characters each Password should contain. A password should be 3-16 characters.
- Select the Password Format. Passwords can be Numeric, Alphabetic, Alpha-Numeric or Custom.
- Enter the Required Number of Passwords for your survey. You can create a maximum of 30,000 passwords at a time.
Pre-Population is not available when Generate Random Passwords is selected.
- Upload Passwords
Choose to upload an existing file of unique identifiers (Employee ID, student ID, etc.). The unique identifier must appear in the first column of the file.Any passwords not processed through these steps cannot be used to access the survey/assessment.
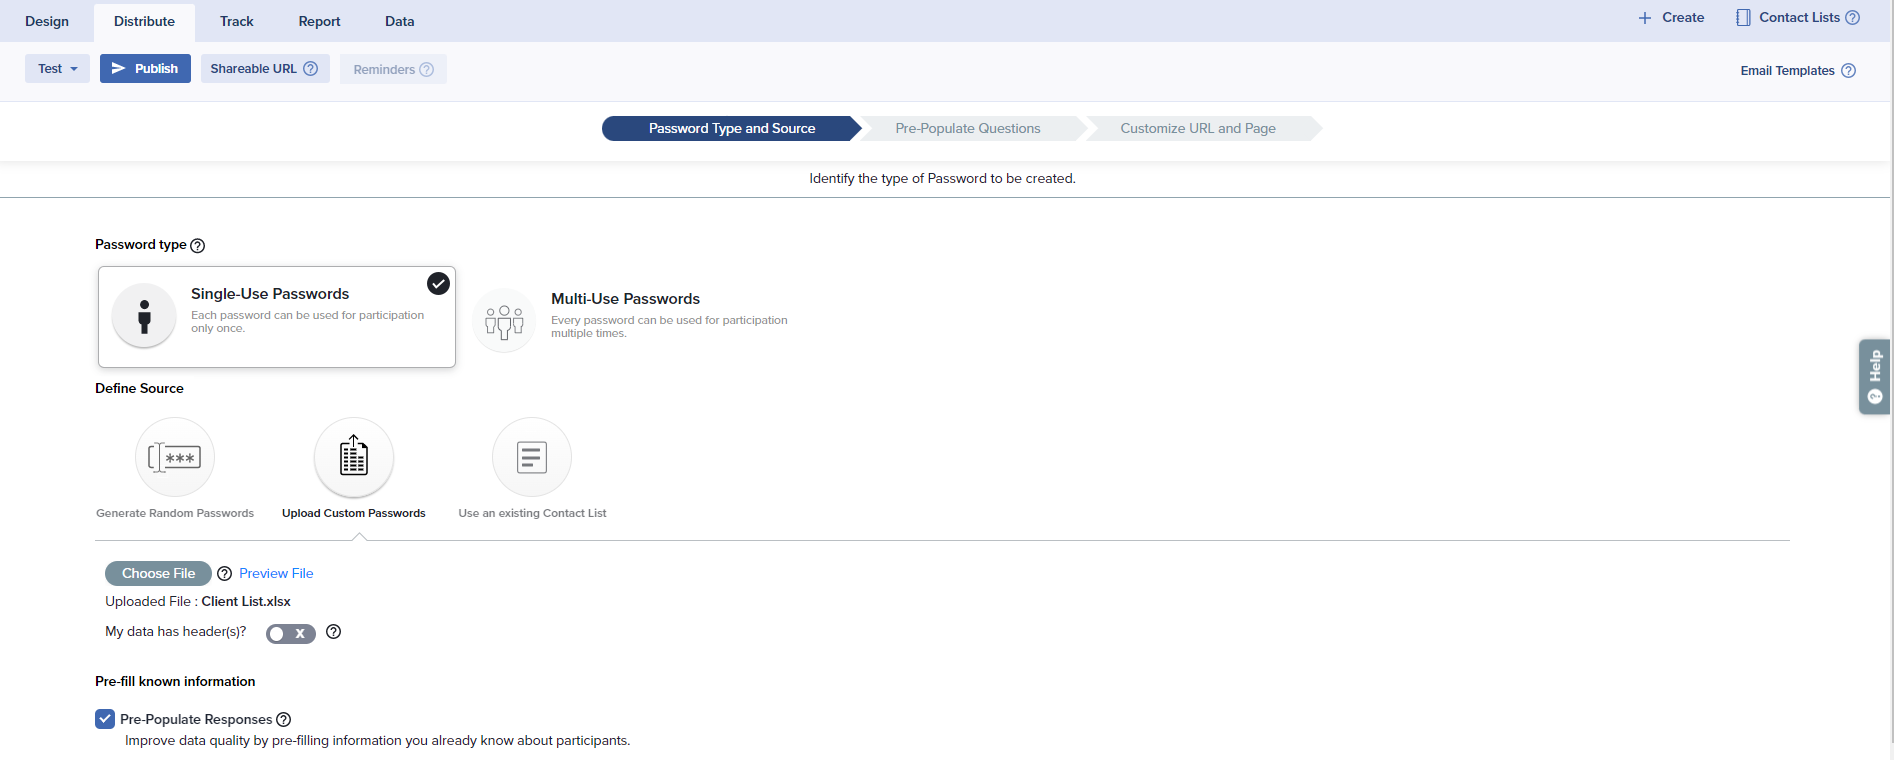
- Select Upload Custom Passwords as your source.
- Upload a File in .txt, .csv, .xls or .xlsx format with maximum size of 10 MB. Remember that the first column of your file will be created as the custom passwords.
- If your file includes column headers,enable My Data has header(s)?.
- Pre-Populate Responses: This option will be selected if Pre-Population is applied on one or more questions. You will be able to map responses to questions in later steps.
Any Pre-Populated values associated with the single-use passwords will be displayed up to 2,000 characters.
- Passwords From a List
If you have already created a list in Contact Lists, you may select Use an existing Contact List as your source.
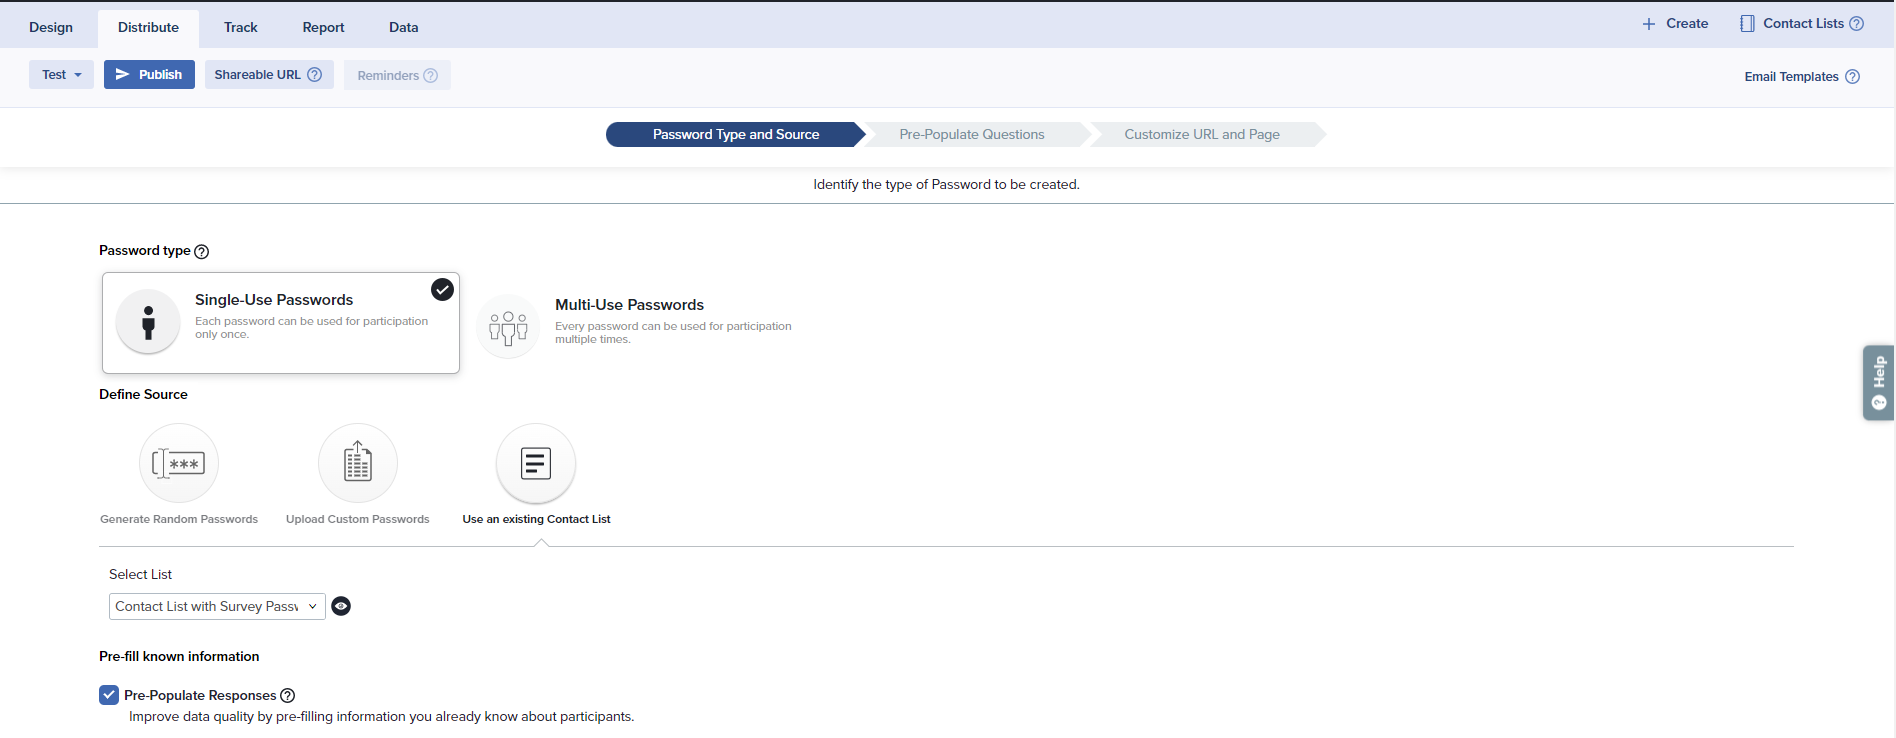
- Select Use an Existing Contact List as your source.
- Select the list from the dropdown menu.
- To ensure you have selected the correct list, you may click on the Preview icon to view your Passwords/Unique IDs from the selected List.
- Pre-Populate Responses: This option will be selected if Pre-Population is applied on one or more questions. You will be able to map responses to questions in later steps.
Any Pre-Populated values associated with the single-use passwords will be displayed up to 2,000 characters.
- Random Passwords
- Click on Continue.
- If your survey includes Pre-Populated values, the Pre-Populate Questions step will auto-map these questions to answers. Clicking Reset will reset all mapped values.
Pre-Population is not available when Generate Random Passwords is selected.
- Any answer mismatches or blanks can be downloaded and reviewed in the next step.
If you have uploaded a file, you can correct and upload the updated file. If you used a Contact List, you’ll be redirected to Contact Lists to make changes.
- Proceed to the next step (Customize URL and Page) by clicking Continue.
- Here, you can customize the survey login page URL.
- Choose to create your login page from a system template or existing login page.
- To copy an existing login page, click the plus icon under ‘Copy login page from another project’.
- To customize a template, hover over the template and click the edit icon.
- On the Edit Template modal, use options on the left menu to customize.
- Once the URL and login page are ready, click Generate to create passwords.
Generating a large number of passwords may take some time. During this time, you may continue to use other platform features.
- Once passwords are generated, you may copy the login page link, download a QR code, or download the list of passwords.
- If you publish this project again with this same distribution method, a list of previously generated URLs will be displayed. You will be able to customize the login page, download passwords, and Generate More Passwords for the same project. You may also choose to create a new URL with new passwords for the same survey by clicking on Create New URL.
Subscribe for tips and insights to drive better decisions!