- Getting Started!
- Building EX Surveys
- EX Metrics
- EX Dashboard
- EX Dashboard Settings
- Analyze your drivers
- Good to know
- Getting Started!
- Why Sogolytics
- Getting Started with Sogolytics
- Tour
- Home
- Verify My Account
- Account Creation
- Introduction to Packages
- Mobile App
- Design
- Introduction to Project Design
- Project Types
- Create a Project
- Question Types
- Question Types
- Add a Question
- Mobile Friendly Questions
- Edit a Question
- Introduction to Simple Question Types
- Introduction to Grid Questions
- Horizontal Radio Button
- Descriptive Text
- Text Box
- Radio Button (Single-Select)
- Drop Down
- Check Box (Multi-Select)
- Demographic
- Rating Scale
- Symbol Rating Scale
- Like/Dislike
- Ranking
- Date
- Image Choice
- Net Promoter Score (NPS)
- Multiple Text Box
- Multiple Drop Down
- Radio Grid
- Check Box Grid
- Rating Radio Grid
- Rating Drop Down Grid
- Rating Scale Grid
- Matrix Grid
- Advanced Questions and Elements
- Page Break
- Captcha
- List Box
- Rating Drop Down
- Rating Radio Button
- Attachment
- Numeric Allocation
- Drill-Down
- Signature
- Re-use Questions and Answers
- Project Logic
- Advanced Design Options
- Page Action
- Project Tools
- Project Options
- Question Sequence
- Introduction to Project Options
- Project Details
- Add Languages
- Anonymous Project
- Display Options
- Event Messages
- Save and Continue Later
- Thank You Message
- Reopen Submitted Responses
- URL Redirect: Static and Dynamic
- Print Options
- Expiry Rules
- Switch Project Type
- Use Chain Invitations to Share Surveys
- Enhanced Participation
- Automatic Email Alerts
- Question Features
- Project Branding and and White Labeling
- Project Customization
- Good to Know
- Distribute
- Introduction
- Publish Project
- Other Publishing Options
- Automated Distribution
- Invitation Templates
- Contact Lists
- Reminders
- Customizing Participation
- Good to Know
- Directory
- Introduction to Directories
- Build Your Directory
- Activity in Directories
- Participation
- Track
- Report
- Introduction to Reports
- Run a Report
- Omni All in One Report
- Text Analysis
- Frequency Reports
- Individual Responses
- Raw Data
- Special Reports
- Legacy Reports
- Charts and Graphs
- Save, Export, Share Reports
- Filter Manager
- Good to Know
- Custom Dashboard
- Introduction to Custom Dashboard
- Build Your Custom Dashboard
- Dashboard Options
- Widgets
- Filter
- Segmentation
- Data & Security
- Cookie Policy
- Import Options
- Export Data
- GDPR
- HIPAA
- Integrations and API
- Account Administration
- Account Settings
- Account Settings
- Update Personal Information
- Update Company Information
- Account Notifications
- Review Account Usage
- Customize Survey Labels
- Project Allocation
- Linked Account
- View Product Details
- Referral Program
- Payment History
- Billing Information
- Two-Step Authentication
- Account Security
- Recent Account Activity
- Single Sign-On (SSO)
- Outbound Email Settings
- Compliance
- Email Settings
- Project Branding
- Manage Sub-Users
- Good to Know
- Billing
- Introduction
- Sign Up and Upgrade
- Acceptable Payment Methods
- Upgrade a Paid Account
- Payment Receipts
- Change Billing Information
- Upgrade Using Purchase Order
- Referral Benefits Program
- Sogolytics Plans
- Payment Methods Available
- Failed Payment
- Switch to Annual Billing
- Upgrade a Basic/Trial Account
- Sign Up for a Paid Account
- Sogolytics Standard Support
- Downgrade or Cancel Account
- Poll Project
- Good to Know
- FAQs
- Getting Started!
- Building CX Surveys
- CX Metrics
- CX Dashboard
- CX Dashboard Settings
- Analyze your drivers
- Good to know
- Getting Started
- Account Set-up
- Account Administration
- Introduction to Account Administration
- Managing Users
- User Groups
- Landing Pages
- Tab Editor
- Critical Alerts
- Enable Browser Based Notifications
- Customer Feedback Preferences
- Turn Emails into Dialogues
- Account Activity Log
- Define Dialogue Aging
- Create Tags
- Comparison Overview
- Raise a Dialogue with Sogolytics
- Safelisting
- Inbox
- Dialogues
- News
- SogoConnect Dashboard
- Campaigns
- Help
- Getting Started!
- Assessment Question types
- Score and more
- Quiz participation
- Get Results
Mail Merge allows you to insert information about each invitee into his/her personal invitation.
Every chance you have to capture an invitee’s attention is a chance to increase their likelihood of completing the survey. Inserting their first name or job title into their invitation is a way to personalize the experience, making them feel involved and engaged, ultimately increasing response rates.
Navigate to
- Adding Mail Merge Code to Email
- Adding Mail Merge Code for Sender’s details
- Sending out Email Invitations with Mail Merge
The Mail Merge feature is also available for the subject line of the email invitation. Response rates are enhanced when participants see a personalized subject line in their inbox even before clicking on the actual email.
Adding Mail Merge Code to Email
Within Email Templates, choose to edit an existing invitation or create a new one.
To add Mail Merge into email content:
- Click on the content of your email, then select Mail Merge from the editor.
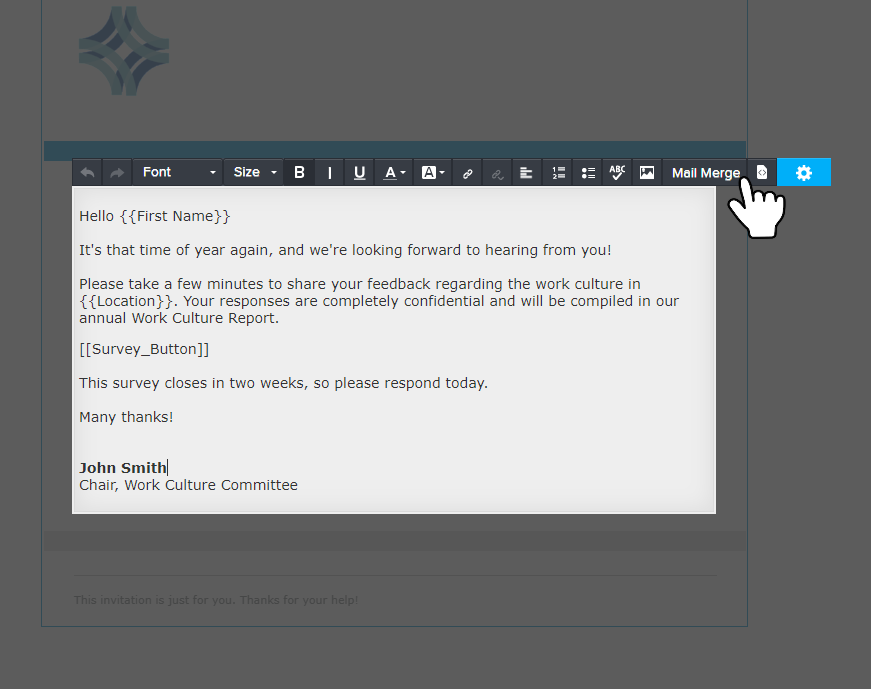
- Click the desired location in your invitation to drop the Mail Merge icon in place.
You may also use Mail Merge in the email subject line. This level of personalization can engage participants early and boost response rates!
- In the Select field dropdown, choose the option that will be shown in this field.
- The Mail Merge code will be displayed like this: {{First Name}}.
Adding Mail Merge Code for Sender’s details
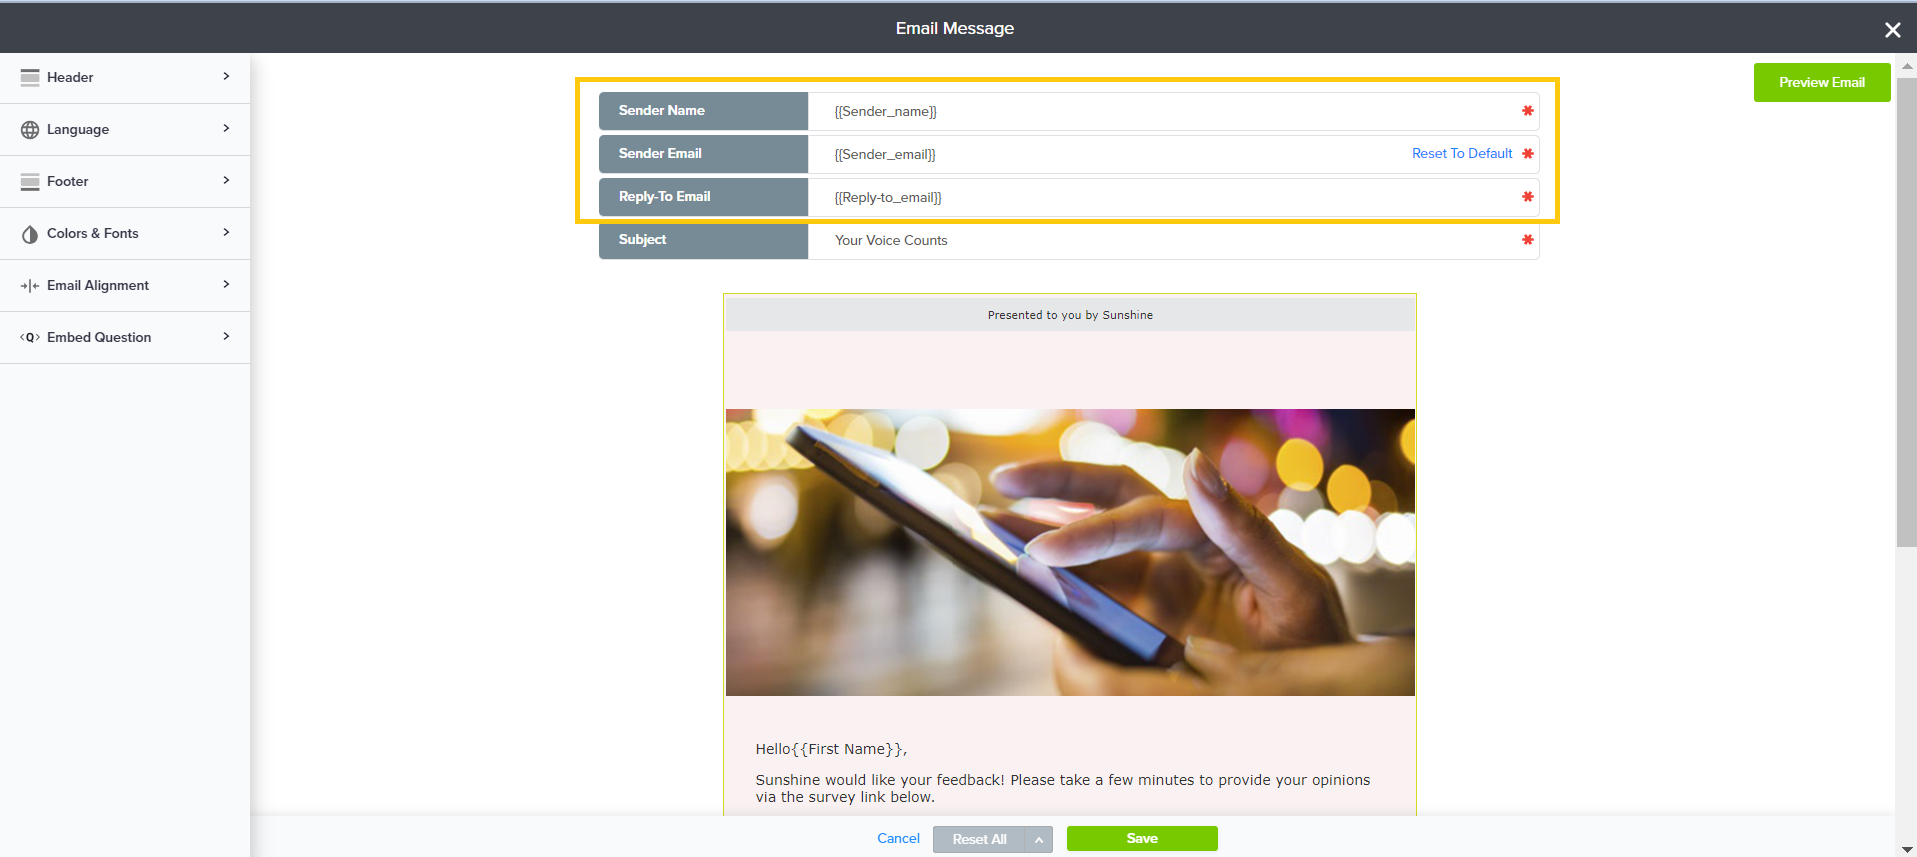
For a more personalized experience for your participants, you can add mail merge fields for sender’s name, sender’s email address as well as reply-to email address.
This feature is available only in our Enterprise plan. Contact us to take advantage of this option.
Here’s how –
- Within Email Templates, choose to edit an existing invitation or create a new one.
- To add mail merge code for Sender’s name, add: {{Sender_name}}
- To add mail merge code for Sender’s email, add: {{Sender_email}}
- To add mail merge code for Reply-to-email, add: {{Reply-to_email}}
- Click Save.
Sending out Email Invitations with Mail Merge
- Select your project and click Publish.
- Under the Email column, select select Single-Use or Multi-Use Link and proceed by clicking on Continue.
- Select the email template containing Mail Merge.
- Select the source of email address.
- Click on Continue.
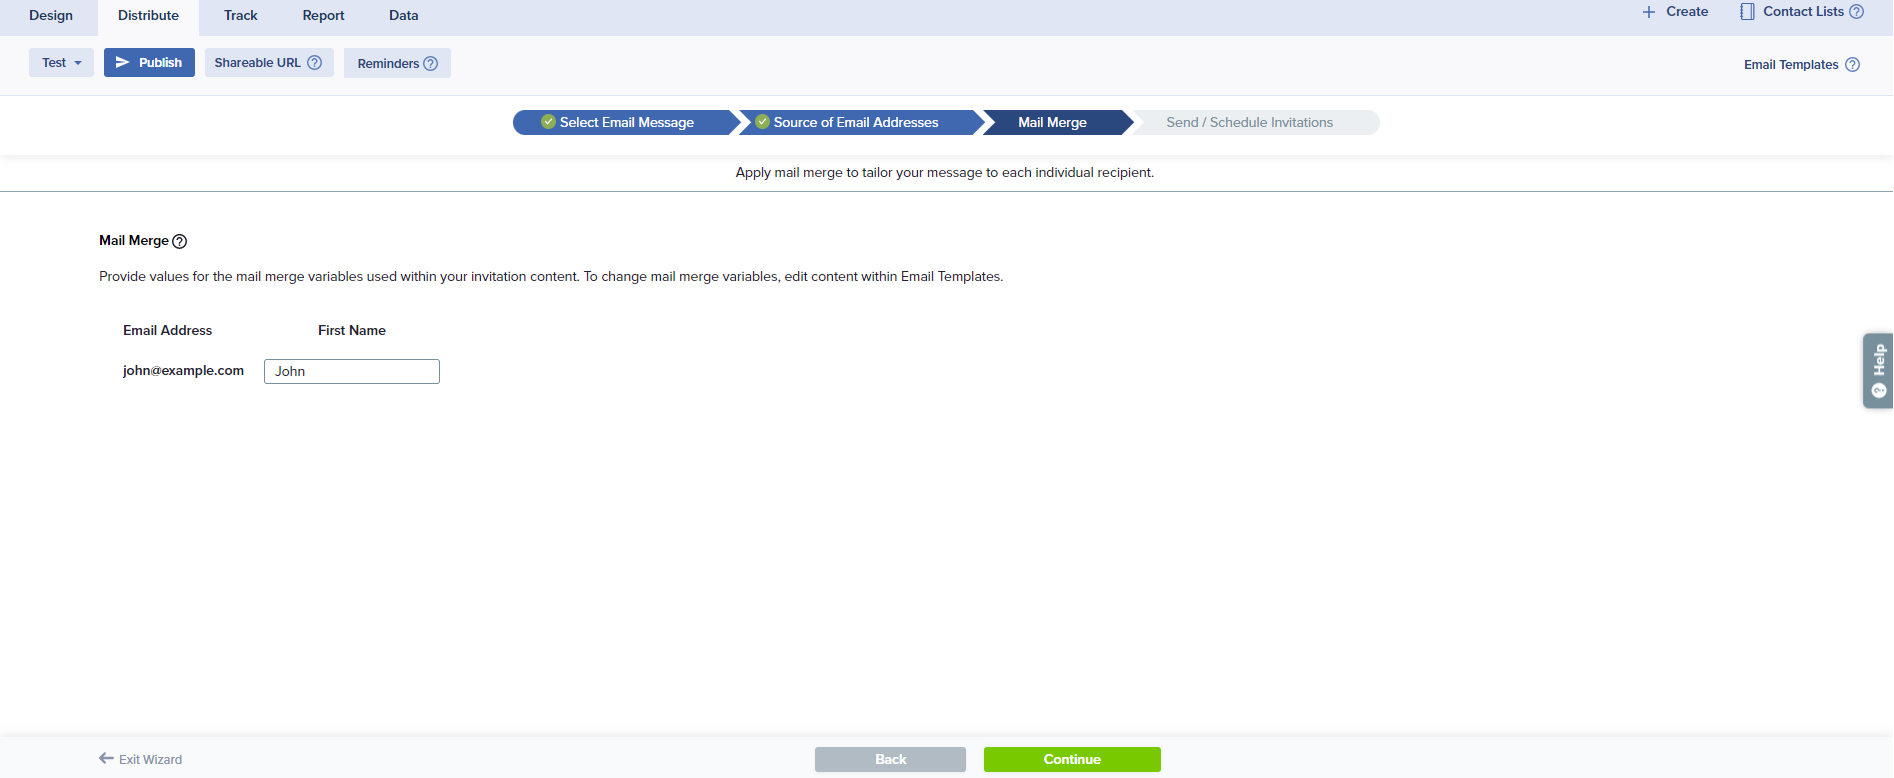
- In the Mail Merge step, provide content for the Mail Merge fields based on the type of source selected.
- If the Email address source is Type manually:
- Provide values for the mail merge variable used within the email content.
- All email addresses will be listed with text boxes so mail merge values can be entered manually
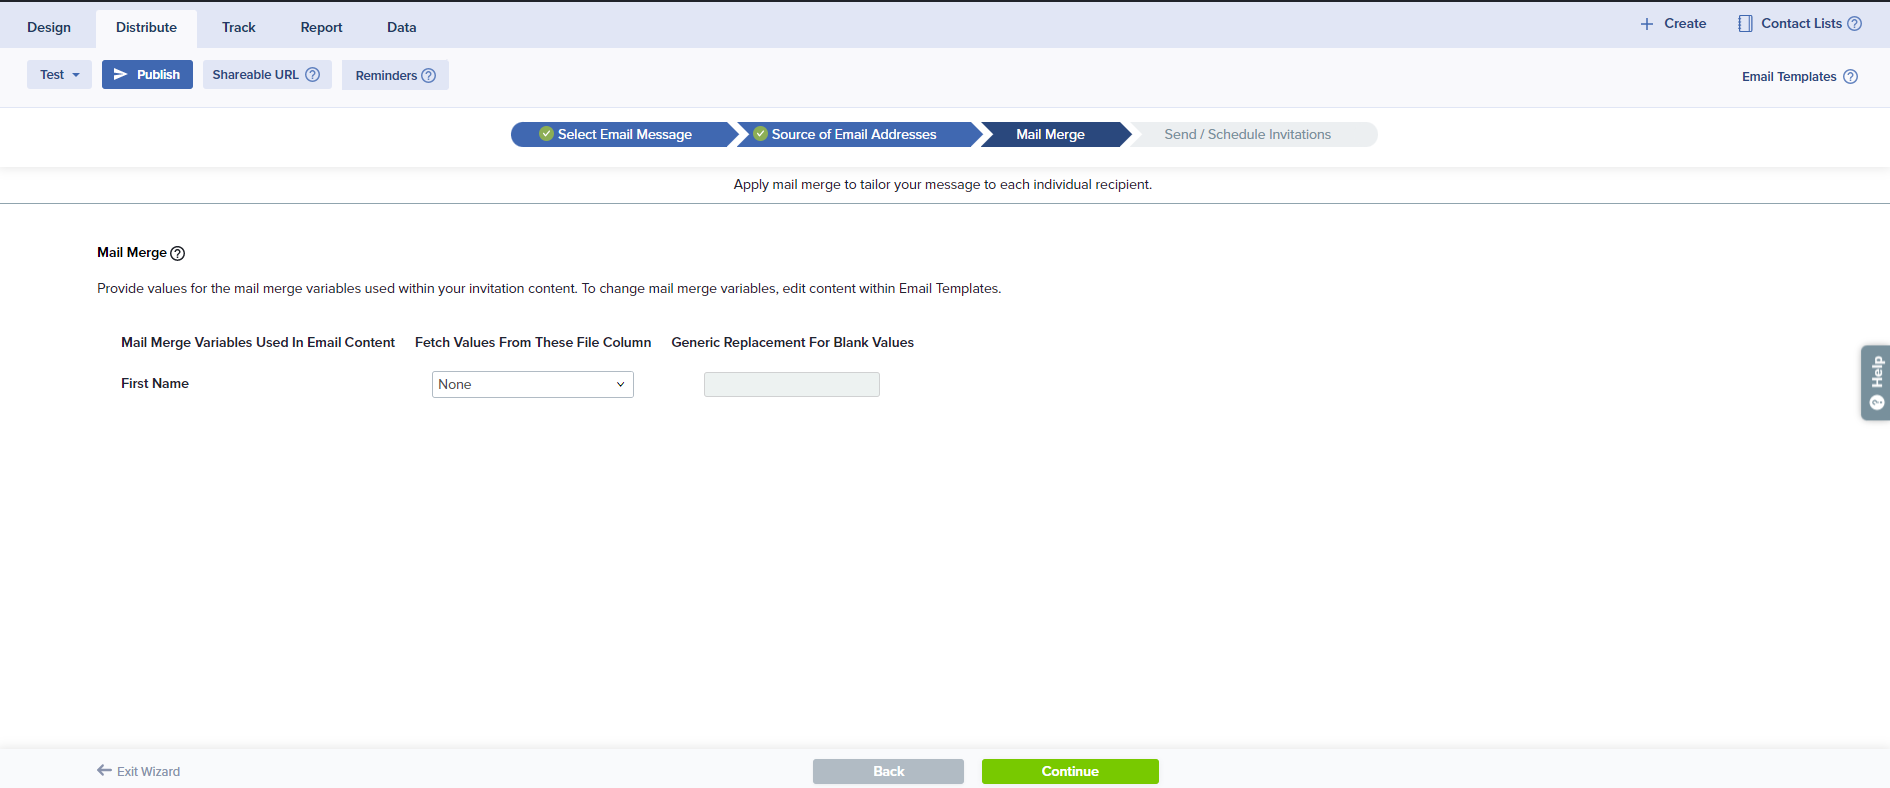
- If the email address source is From a File:
- Map the values from the file columns to the Mail Merge variable used in the Email Content.
- In the column Generic Replacement For Blank Values, enter content that will be displayed if a field in your file is blank (e.g., Friend, Community Member).
- If the email address source is From a List:
- Map the values from the list columns to the Mail Merge variable used in the Email Content.
- In the column Generic Replacement For Blank Values, enter content that will be displayed if a field in your list is blank (e.g., Friend, Community Member).
- If the Email address source is Type manually:
- Click on Continue and follow the wizard to send invitations with Mail Merge values.
If you are not seeing the Mail Merge step, you have likely not entered the mail merge code in the email content section. If you want to include these values in your message, you can return to edit your content and include these codes.
Tags
EmailSubscribe for tips and insights to drive better decisions!
